Understanding Searching
WITHIN SPYCLOUD INVESTIGATIONS MODULE
🧭 Overview
SpyCloud Investigations lets you surface every appearance of an asset across our data lake and pivot seamlessly into deeper analysis. This guide explains how to launch a search, move between Search, Investigate, and Current Investigation, and interpret the result views.
🗂️ Navigation
When you first enter Investigations the left nav shows Search. After you run a query the label changes to Investigate and a new item, Current Investigation, appears directly above it.
- Search – visible until the first query is submitted.
- Investigate – replaces Search and remains available so you can open additional searches at any time.
- Current Investigation – automatically selected after each search; stores every tab and filter for that session.
👇NAVIGATION PANEL
🧪 Search Modes
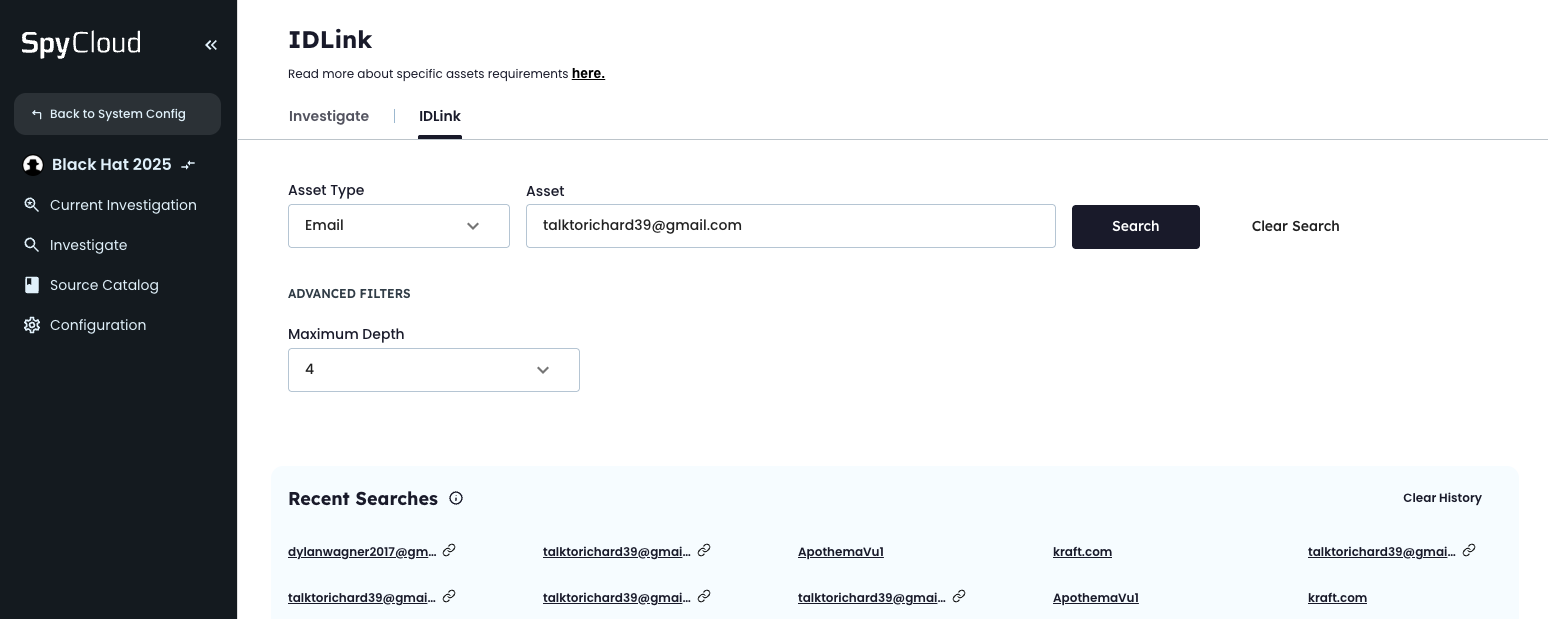
🧠 IDLink (Core and Pro Licenses Only)
- Accepts e‑mail, phone, and username inputs.
- Lets you broaden or narrow matching by changing record depth.
- A header banner displays X of Y records added via IDLink.
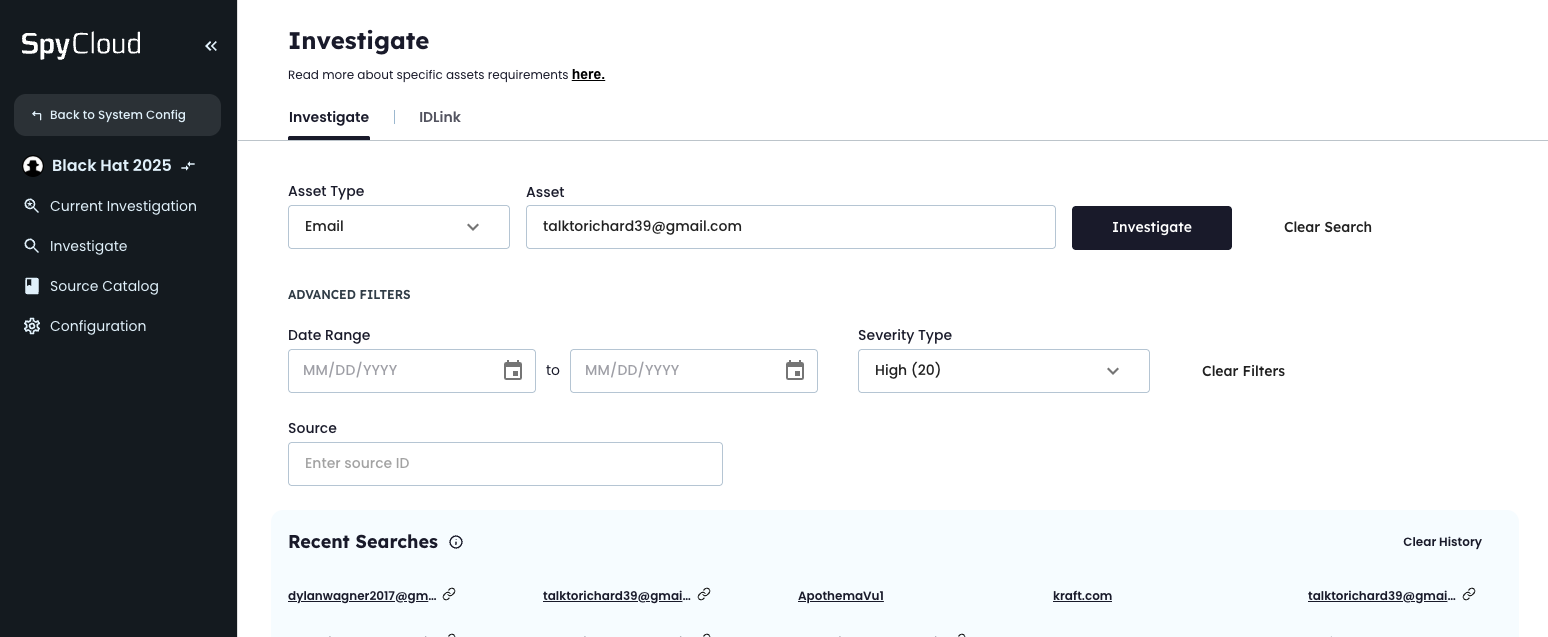
🔬 Standard (Investigate)
- Supports 15+ asset types, including non‑identity assets such as domains.
- Additional scope controls: Source ID picker, Record Date, and Severity selector.
🔎 Searching
Prerequisite: you must be assigned an Investigations Lite or Pro seat.
- Choose to search with IDLink to enable holistic visibility including social identity data or start with the standard Investigate tab.
- Choose an asset type (e‑mail, domain, phone, username, etc.).
- Enter the asset value you want to investigate.
- Optionally adjust record depth (IDLink only), date range, severity, or specify a source.
- Click Search.
👇 SEARCH PANEL
🧬 What happens behind the scenes
- The asset is matched against records — cleaned, de‑duplicated collections derived from breaches, malware logs, and other sources.
- Related records are stitched into an investigation so you can see every leaked identity data point in one place.
- When IDLink is enabled, additional social data and indirect matches are appended, and the UI flags how many records came from IDLink.
📋 Working with Results
Results appear in Current Investigation with two tabs:
| Tab | Description |
|---|---|
| Results | Tables that break down returned assets, show top sub‑domains, list physical addresses, and provide a searchable detail view you can filter and export to CSV. |
| Overview | Dashboards that surface commonly cited metrics: most represented assets, source distribution, and record timeline. |
👇RESULTS & OVERVIEW
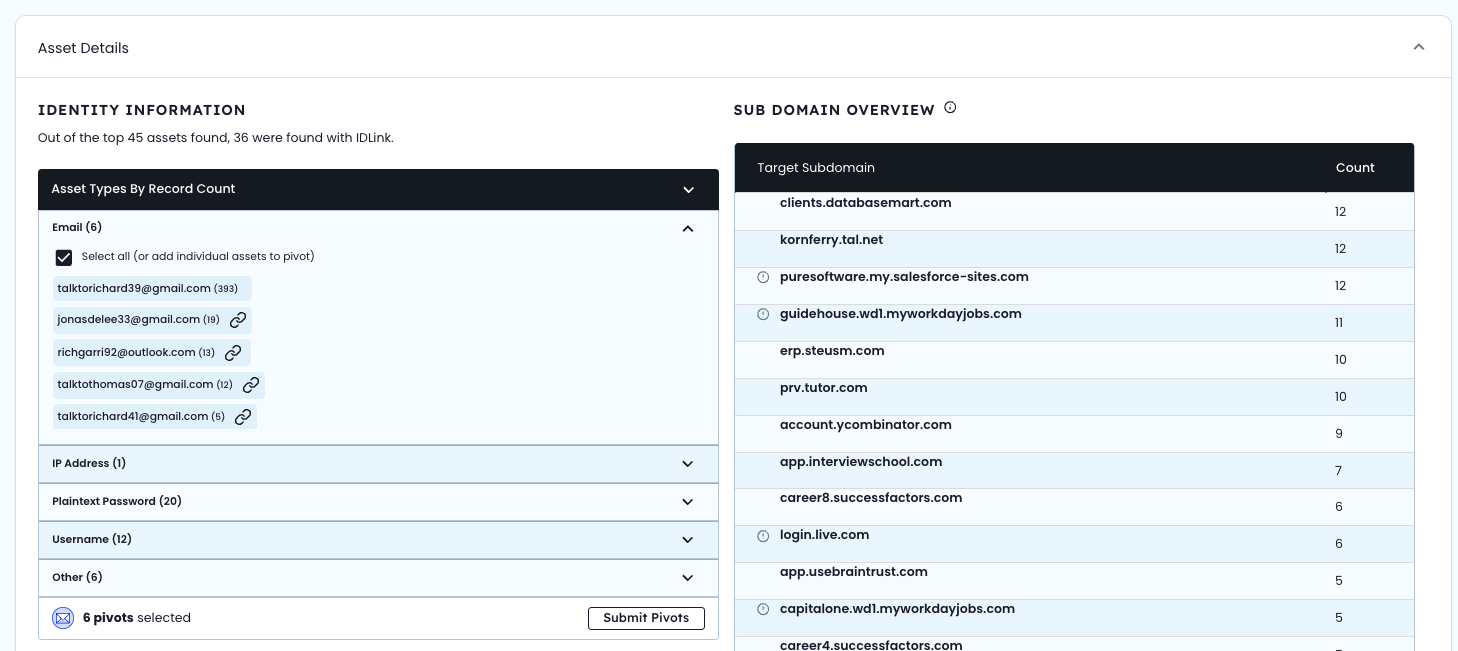
🔁 Pivoting
- Select from assets in the Assets by Record Count table to pivot, adding that asset to your query and expanding scope.
- Click submit pivot to confirm the pivot you want to add.
- Pivot wait times vary by asset count.
👇PIVOT WORKFLOW

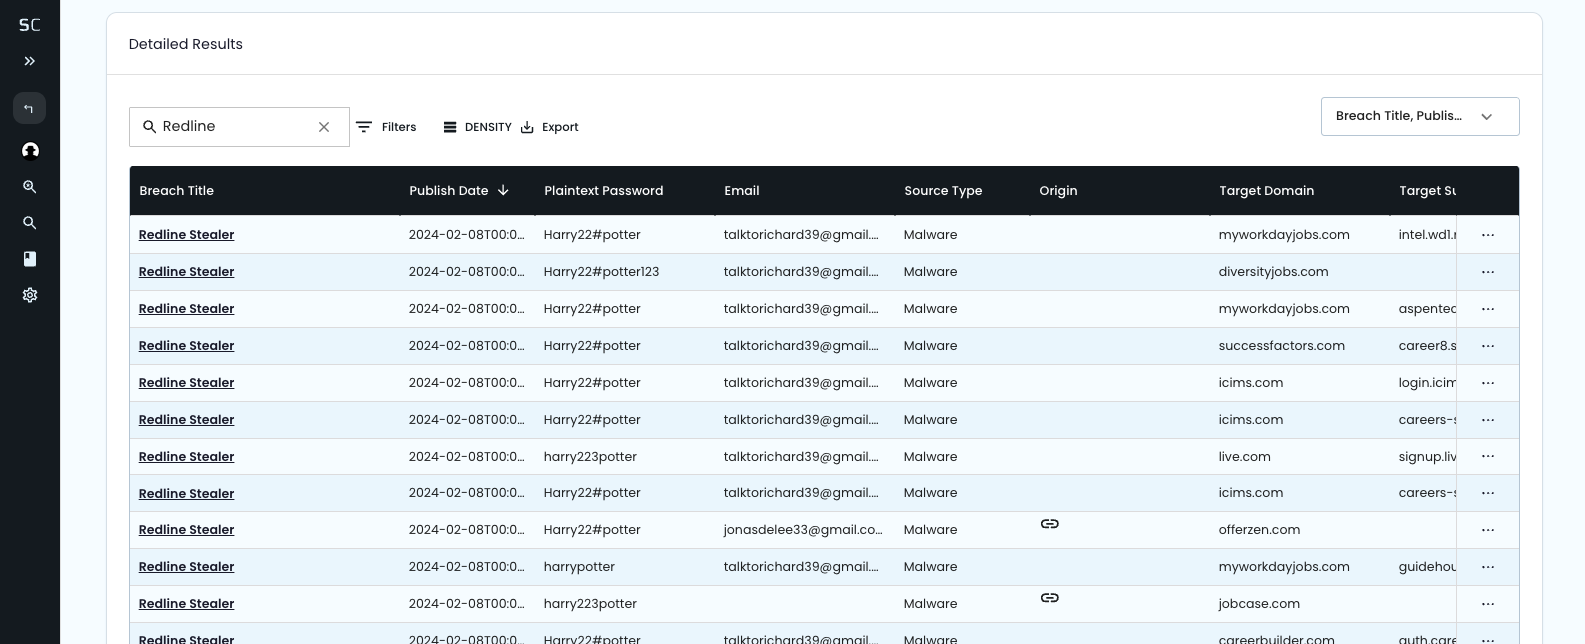
📊 Detailed Results
- Search by data type or specific source
- Use the Filter drawer to combine >50 data attributes and exposure types
- Export table to CSV. Filters applied in the UI are respected in the export.
👇DETAILED FILTERED RESULTS