Advanced | Configuring Remediations
ADG supports the creation of Remediation Policies that can be applied during scans.
Remediation Policies determine:
- ✅ Which actions ADG will take when a password match is found
- ✅ Which email notifications ADG will send for matches
- ✅ Which users are excluded from those actions/notifications
- ✅ Which optional emails are sent to excluded users
🔧 Managing Remediation Policies
Navigate to: Advanced Settings → Remediations
From here, you can:
- Create a new Remediation Policy
- Edit an existing policy
- Delete a policy (⚠️ cannot delete if it’s in use by a scheduled scan)
You can also create/edit Remediation Policies directly from Manual Scan or Scheduled Scan configuration pages.

➕ Creating a Remediation Policy
- Click Add
- Enter a unique name in Remediation Policy Name
- Best practice: Use descriptive names like
- Force Password Reset and Send User Outreach Email
- Disable Account – No Notification
- Best practice: Use descriptive names like
⚡ Match Actions
Choose which actions to perform if a password match occurs:
- Disable User
- Force Password Reset
- Okta Password Reset (requires Okta setup under Configuring Okta)
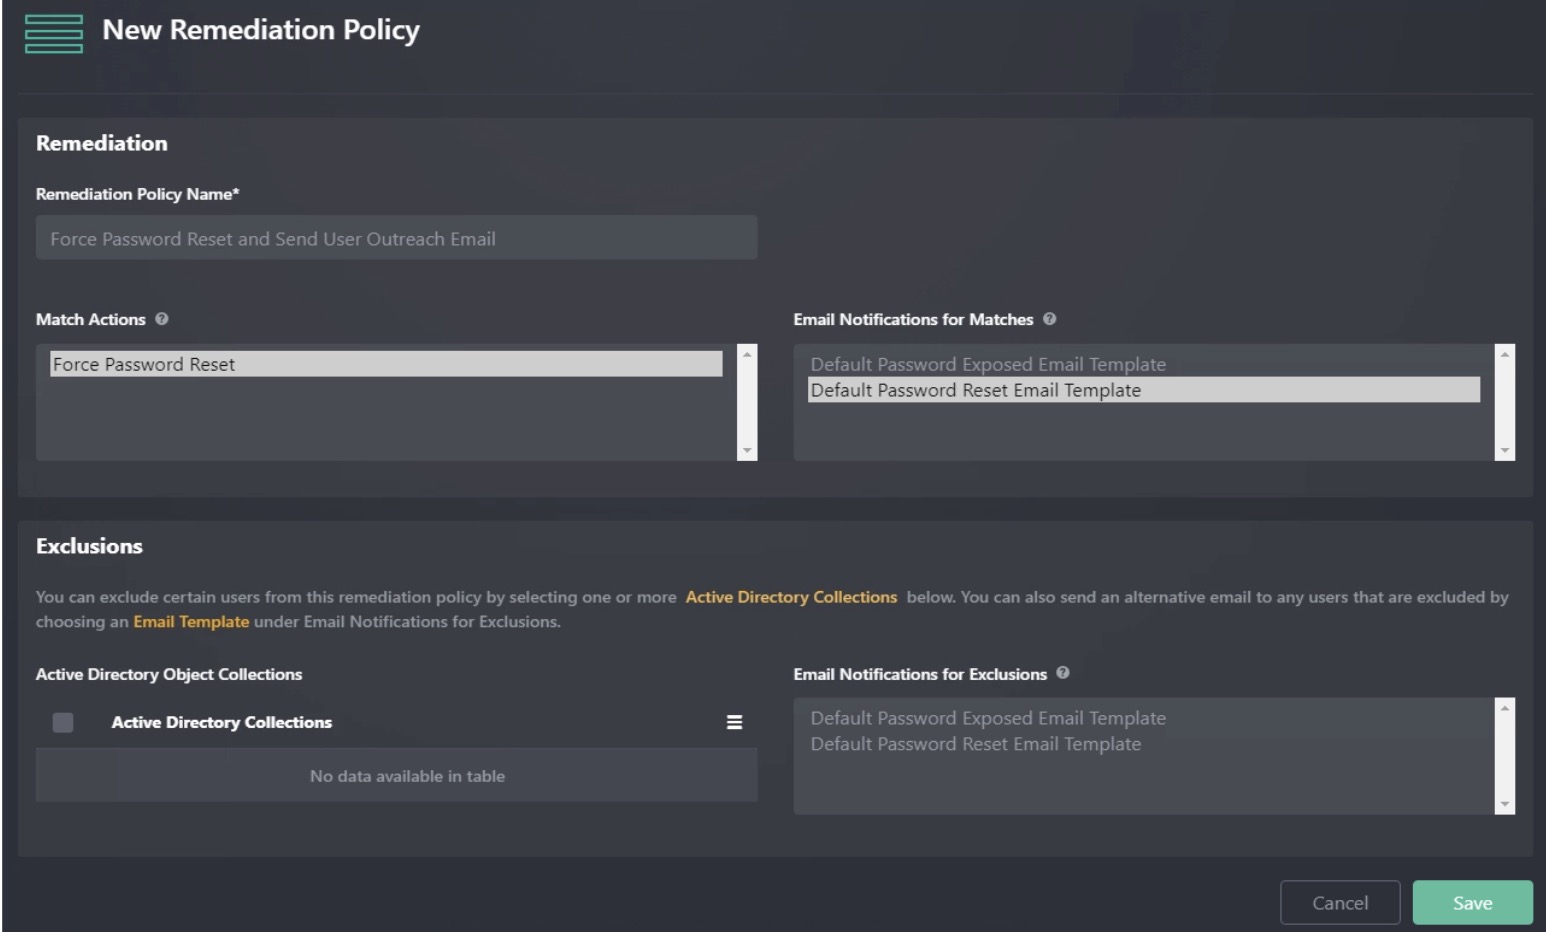
✉️ Email Notifications for Matches
- Choose one or more User-type Email Templates
- These will be sent to affected AD users when their accounts match
🚫 Exclusions
- Select zero or more AD Object Collections to exclude from remediation
- Example: Exclude Service Accounts or Executive Accounts
👉 See Active Directory Object Collections for more details.
✉️ Email Notifications for Exclusions
For excluded users, you may also configure emails to notify them using one or more templates.
This lets you track excluded accounts without taking remediation actions.
💾 Saving the Policy
Once defined, click Save.
Your policy will then be available when running either:
- Manual Scans
- Scheduled Scans